Overview
Setting up your CertLister account takes less than 5 minutes. You’ll create your organization, set up your profile, and be ready to start issuing certificates.
Method 1: Sign Up with Email and Password
Step 1: Go to the Sign Up Page
- Visit https://certlister.com
- Click the “Get Started” or “Sign Up” button in the top right corner
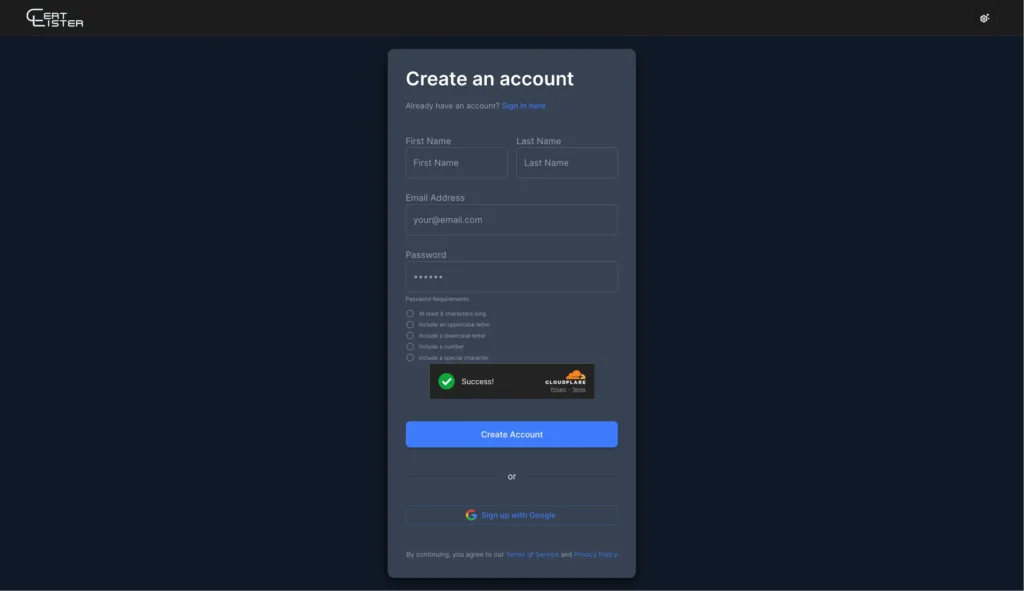
Step 2: Fill Out the Registration Form
You’ll see a registration form with these fields:
Your Account Information:
- First Name – Your first name
- Example: “Sarah”
- Last Name – Your last name
- Example: “Johnson”
- Email Address – Your work email (you’ll use this to log in)
- Example: “sarah@yourschool.edu”
- Password – Must meet security requirements:
- At least 8 characters long
- One uppercase letter (A-Z)
- One lowercase letter (a-z)
- One number (0-9)
- One special character (!@#$%^&* etc.)
- Example: “MySchool2024!”
Important: Your organization will be automatically created as “[Your First Name]’s Organization”. You can change this later in Settings.
Accept Terms:
- ✅ By continuing, you agree to the Terms of Service and Privacy Policy (links provided on the form)
Step 3: Complete CAPTCHA Verification
CertLister uses Cloudflare Turnstile to prevent spam accounts.
- You’ll see a CAPTCHA verification box
- Check the box that says “I am human”
- Wait for the green checkmark
Step 4: Click “Create Account”
- Review all information for accuracy
- Click the “Create Account” button
- Wait a few seconds while your account is created
Step 5: Verify Your Email (if required)
Depending on your settings, you may need to verify your email:
- Check your email inbox for a message from CertLister
- Click the verification link in the email
- You’ll be redirected back to CertLister
Didn’t receive the email?
- Check your spam/junk folder
- Wait 5 minutes (sometimes emails are delayed)
- Request a new verification email from the login page
Method 2: Sign Up with Google
Faster option if you have a Google account
Step 1: Click “Sign Up with Google”
- On the registration page, click the “Sign Up with Google” button
- A Google sign-in popup will appear
Step 2: Choose Your Google Account
- Select the Google account you want to use
- Review the permissions CertLister is requesting
- Basic profile information (name, email)
- This is used only for your account setup
- Click “Continue” or “Allow”
Step 3: Complete Setup
Since you’re signing in with Google, CertLister already has your name and email.
Your organization will be automatically created as “[Your First Name]’s Organization”. You can change this later in Settings → Organization.
Click “Complete Setup” to finish registration.
What Happens After Sign Up?
Automatic Setup
When you create your account, CertLister automatically:
✅ Creates your organization database
✅ Sets you as the organization Admin
✅ Generates 5 sample certificate categories
✅ Creates 20 sample certificates (for testing)
✅ Sets up your verification portal
✅ Initializes your dashboard
This all happens in under 5 seconds.
You’ll Be Redirected to Your Dashboard
After successful sign-up, you’ll see:
- Welcome message – “Welcome to CertLister!”
- Interactive tour prompt – Option to take a guided tour (recommended for new users)
- Your dashboard – Showing your sample data
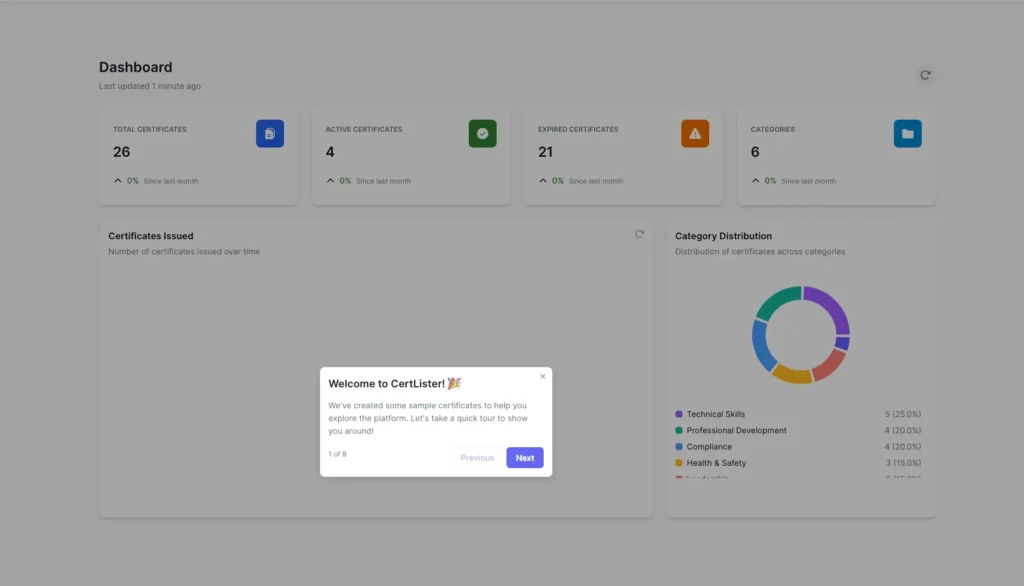
Take the Interactive Tour (Recommended)
For new users, we recommend taking the 3-minute interactive tour:
- Click “Start Tour” when prompted
- Follow the step-by-step guide
- Learn where everything is located
Tour covers:
- Dashboard overview
- Creating certificates
- Managing categories
- Verification system
- Settings and team members
You can skip the tour and take it later from Settings → Help & Tours.
Your Free Tier Account
When you sign up, you automatically get:
✅ 50 certificates – More than enough to get started
✅ 1 user – That’s you (invite more with Pro)
✅ All core features – Certificate management, verification, expiration tracking
✅ Public verification portal – Let employers verify certificates instantly
✅ Professional templates – 3 certificate templates to choose from
✅ No credit card required – Completely free, no trial limitations
✅ No time limit – Use the Free tier forever
Want more? Upgrade to Pro for unlimited certificates and team collaboration.
Next Steps
Now that your account is created, here’s what to do next:
1. Explore Your Dashboard (5 minutes)
Learn what the dashboard shows and where to find features.
→ Read: Understanding Your Dashboard
2. Delete Sample Data (2 minutes)
CertLister created sample certificates for testing. Delete them before adding real data.
How to delete sample certificates:
- Go to Certificates page
- Select all certificates (checkbox at top)
- Click “Delete Selected”
- Confirm deletion
How to delete sample categories:
- Go to Categories page
- Delete or rename the sample categories
3. Create Your First Real Certificate (10 minutes)
Follow our step-by-step guide to issue your first certificate.
→ Read: Create Your First Certificate
4. Invite Team Members (Optional, 5 minutes)
If others will help manage certificates, invite them now.
Troubleshooting
“Email already exists”
Problem: You already have an account with that email.
Solution:
- Try logging in instead of signing up
- Use the “Forgot Password” link if you don’t remember your password
- Use a different email address if you want a separate account
“Password too weak”
Problem: Your password doesn’t meet security requirements.
Requirements:
- At least 8 characters long
- One uppercase letter (A-Z)
- One lowercase letter (a-z)
- One number (0-9)
- One special character (!@#$%^&*)
Solution:
- Use a mix of all required character types
- Avoid common passwords (like “Password123!”)
- Example: “MySchool2026!”
“First name required” or “Last name required”
Problem: You didn’t enter your name.
Solution:
- Enter both your first name and last name
- These are used to create your account and auto-generate your organization name
- Use your real name for better professionalism
CAPTCHA not working
Problem: The verification box won’t load or accept your input.
Solution:
- Refresh the page and try again
- Disable browser extensions (especially ad blockers) temporarily
- Try a different browser (Chrome, Firefox, Safari, Edge all work)
- Check your internet connection
Account created but can’t log in
Problem: You created an account but login fails.
Possible causes:
- Email verification required – Check your email for a verification link
- Wrong password – Use “Forgot Password” to reset
- Account locked – After 5 failed login attempts, accounts lock for 15 minutes
Solution:
- Check your email for verification message
- Wait 15 minutes if account is locked
- Use “Forgot Password” if you’re unsure of your password
Google Sign-In not working
Problem: Google button doesn’t work or shows an error.
Common issues:
- Popup blocked – Allow popups for certlister.com in your browser
- Third-party cookies disabled – Enable cookies in browser settings
- Google account issue – Try signing out of Google and back in
Solution:
- Check browser settings to allow popups and cookies
- Try regular email/password sign-up instead
- Clear browser cache and try again
Security Tips
Keep Your Account Secure
✅ Use a strong password – At least 12 characters with mixed types
✅ Don’t share your login – Each team member should have their own account
✅ Log out on shared computers – Don’t stay logged in on public/shared devices
✅ Enable two-factor authentication – Extra security for your account (available in Settings)
✅ Keep email secure – Your account recovery goes through email
Your Data is Safe
CertLister uses enterprise-level security:
- Encrypted connections – All data transmitted over HTTPS
- Secure passwords – Passwords are hashed with bcrypt (never stored as plain text)
- Isolated data – Your organization’s data is isolated from others
- Regular backups – Data backed up daily
- Google Cloud Platform – Hosted on secure, reliable infrastructure
Frequently Asked Questions
Q: Is the Free tier really free forever?
A: Yes. There’s no time limit, no credit card required, and no surprise charges. You can use the Free tier (50 certificates, 1 user) indefinitely.
Q: Can I create multiple organizations?
A: Each email address can have one organization. If you need multiple separate organizations (e.g., different schools), use different email addresses or contact support for multi-organization accounts.
Q: Can I change my organization name later?
A: Yes. Go to Settings → Organization and update your organization name anytime.
Q: What happens to my sample data?
A: Sample certificates and categories are created to help you learn the system. You can delete them anytime. They count toward your 50-certificate limit on the Free tier.
Q: Can I upgrade to Pro later?
A: Absolutely. You can upgrade from Free to Pro anytime. Your existing certificates and data remain intact.
Q: What if I need help?
A: We’re here to help:
- Help Center – Browse all help articles (you’re reading one now!)
- Contact Support – Email info@certlister.com
- Response time – Usually within 24 hours on business days


