Quick Start Checklist
Overview
This checklist guides you through setting up CertLister from day one to being fully operational. Complete all steps to get the most out of your certificate management system.
Total time: 1-2 hours Skill level: Beginner-friendly
Phase 1: Account Setup (15 minutes)
Task 1: Create Your Account
What to do:
- Sign up at certlister.com
- Choose email/password or Google sign-in
- Enter your organization name
Task 2: Take the Interactive Tour
What to do:
- Click "Start Tour" when prompted after sign-up
- Follow the 3-minute guided walkthrough
- Learn where key features are located
Why it matters:
- Saves time finding features later
- Shows you the basics
- Interactive and visual
Skipped the tour? Access it later: Settings → Help & Tours
Task 3: Understand Your Dashboard
What to do:
- Review the 4 stat cards (Total, Active, Expired, Categories)
- Check your statistics (even if zero)
- Explore the 2 analytics charts (Trend Chart, Category Distribution)
Time: 5 minutes
Phase 2: Clean Up Sample Data (10 minutes)
Task 4: Delete Sample Certificates
What to do: CertLister created 20 sample certificates when you signed up. Delete these before adding real data.
Steps:
- Go to Certificates page
- Select all (checkbox at top)
- Click "Delete Selected"
- Confirm deletion
Why: Frees up space in your Free tier (50 certificate limit)
Task 5: Review Sample Categories
What to do: CertLister created 5 sample categories. Review and decide what to keep.
Steps:
- Go to Categories page
- Review the 5 sample categories
- Delete ones you won't use
- Rename ones that fit your needs
- Keep any that match your certificate types
Sample categories:
- CPR Certification
- First Aid
- Safety Training
- Professional Development
- Vocational Skills
Tip: You can always create new categories later. Start with 3-5 categories max.
Phase 3: Set Up Categories (15 minutes)
Task 6: Plan Your Category Structure
What to do: Before creating certificates, decide how you'll organize them.
Questions to answer:
- What types of certificates do you issue?
- How many different types? (aim for 5-15 categories)
- Do you need subcategories? (no - keep it simple)
Example structures:
Vocational School:
- Welding Certification
- HVAC Training
- Electrical Safety
- Plumbing Certificate
- Automotive Skills
Corporate Training:
- Compliance Training
- Safety Certifications
- Professional Development
- Technical Skills
- Leadership Training
Healthcare:
- CPR/BLS
- First Aid
- ACLS
- Infection Control
- Patient Safety
Task 7: Create Your Categories
What to do: Create 3-5 categories to start with.
Steps:
- Go to Categories page
- Click "+ Create Category"
- Enter category name
- Add description (optional but recommended)
- Save
- Repeat for each category
Tips:
- Use clear, descriptive names
- Be consistent with naming (all title case or all lowercase)
- Add descriptions to help team members choose correctly
Phase 4: Create Your First Certificates (30 minutes)
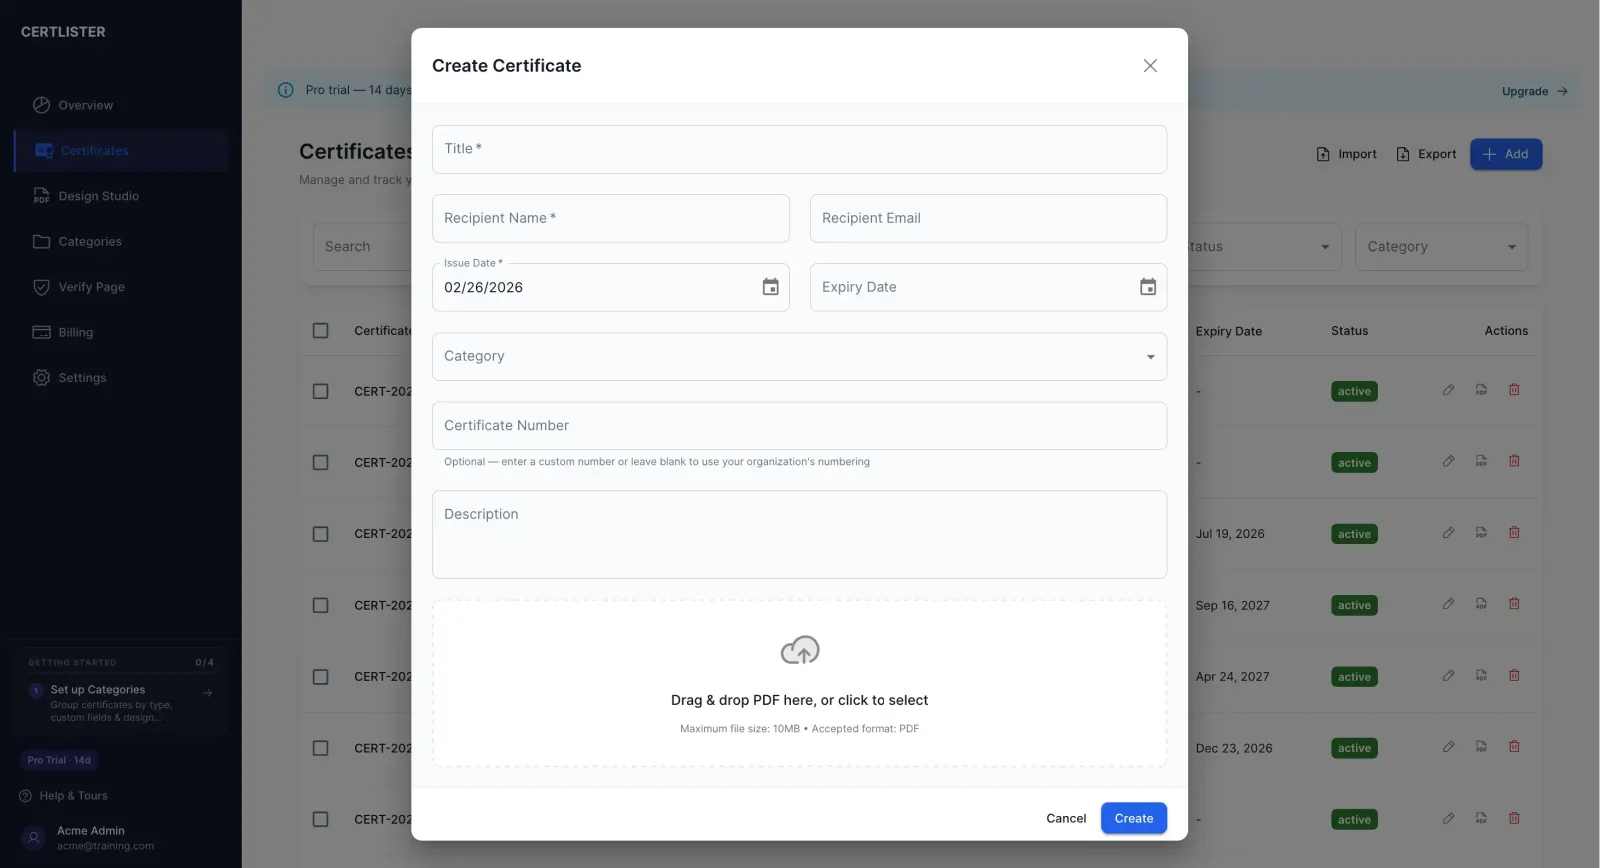
Task 8: Issue Your First Certificate
What to do: Create a real certificate for a student, trainee, or employee.
Steps:
- Click "Create New Certificate" (Dashboard or Certificates page)
- Fill out:
- Recipient name
- Certificate title
- Category
- Issue date
- Expiration date (if applicable)
- Click "Create Certificate"
- View the generated PDF
Task 9: Test the Design Studio Templates
What to do: Visit the Design Studio to see which of the 4 templates you prefer.
Steps:
- Go to Generate in the left sidebar
- Browse the available templates: Classic, Elegant, Elegant Minimal, and Modern
- Select a template and customize the layout
- Generate a test certificate PDF
- Decide which template fits your brand
Tip: You can delete test certificates after reviewing, or use them for training team members.
Task 10: Practice Editing a Certificate
What to do: Learn how to fix mistakes by editing a certificate.
Steps:
- Open one of your test certificates
- Click "Edit Certificate"
- Change something (e.g., fix a typo in the name)
- Save changes
- View the updated certificate
Why practice: You'll occasionally need to fix data entry errors or update information.
Phase 5: Set Up Verification (15 minutes)
Task 11: Test Public Verification
What to do: Make sure your verification portal works.
Steps:
- Open a certificate you created
- Copy the certificate number
- Open a new browser window (incognito/private mode is best)
- Go to your verification portal:
- https://certlister.com/verify (or your custom URL)
- Enter the certificate number
- Verify it shows correct information
What you should see:
- Recipient name
- Certificate title
- Issue date
- Status (Active)
- Your organization name
Task 12: Add Verification Info to Certificates
What to do: Make sure recipients and employers know how to verify.
Options:
Option A: Include in Email When sending certificates, include:
Your certificate number: CERT-XXXX-XXXX
Verify at: https://certlister.com/verify
Option B: Print on Certificate (Future) If using custom templates (Pro feature), add verification URL directly on certificate PDF.
Option C: On Your Website Add a verification link/widget to your website.
Learn more: Certificate Verification: Verify Page & Embedding
Phase 6: Bulk Operations (Optional, 20 minutes)
Skip this if you'll create certificates one at a time.
Task 13: Prepare CSV for Bulk Import
What to do: If you have existing certificate data, prepare it for import.
Steps:
- Open your existing data (Excel, Google Sheets, etc.)
- Format as CSV with these columns:
- recipient_name
- certificate_title
- category_name
- issue_date
- expiration_date (optional)
- Save as CSV file
Learn more: Bulk Import Certificates from CSV
Task 14: Test Bulk Import with Sample Data
What to do: Import a small batch (5-10 certificates) to test the process.
Steps:
- Create a CSV with 5-10 certificates
- Go to Certificates → Import
- Upload your CSV
- Review any errors
- Confirm import
- Verify certificates were created correctly
Why test first: Catch formatting issues before importing hundreds of certificates.
Phase 7: Configure Settings (10 minutes)
Task 15: Update Organization Profile
What to do: Make sure your organization information is correct.
Steps:
- Go to Settings → Organization
- Review/update:
- Organization name (appears on certificates)
- Contact email
- Website (optional)
- Address (optional)
- Save changes
Task 16: Set Your Preferences
What to do: Customize settings to match your workflow.
Settings to review:
- Date format (MM/DD/YYYY or DD/MM/YYYY)
- Time zone
- Email notifications (on/off)
- Default template
Where: Settings → Notifications (for email preferences)
Task 17: Review Security Settings
What to do: Make your account secure.
Steps:
- Go to Settings → General
- Review your current password strength
- Consider changing your password if you used something simple during sign-up
- Use Settings → Team to ensure only the right people have Admin access
Phase 8: Go Live (5 minutes)
Task 18: Announce to Stakeholders
What to do: Let people know you're using CertLister.
Announce to:
- Students/Trainees: "We now issue digital certificates with instant verification"
- Employers: "You can verify our certificates at certlister.com/verify"
- Team members: "We've switched to CertLister for certificate management"
- Website visitors: Add verification widget to website
Communication channels:
- Email announcement
- Website update
- Social media post
- Include in next newsletter
Task 19: Update Certificate Distribution Process
What to do: Decide how you'll deliver certificates going forward.
Options:
Option A: Email PDFs
- Generate certificate
- Download PDF
- Email to recipient with verification instructions
Option B: Print and Mail
- Generate certificate
- Download PDF
- Print on cardstock
- Mail to recipient
Option C: Bulk Distribution
- Import certificates in batch
- Generate all PDFs
- Email via mail merge tool
Document your process so team members follow the same workflow.
Ongoing Maintenance Tasks
Daily Tasks (5 minutes)
- Check dashboard for any issues
- Create certificates as needed
- Respond to verification questions (if any)
Weekly Tasks (15 minutes)
- Review upcoming expirations (30-day view)
- Clean up any test certificates
- Check verification logs (who's verifying?)
- Plan renewal training if needed
Monthly Tasks (30 minutes)
- Export certificates for backup
- Review categories (merge or delete unused)
- Check verification activity trends
- Update team on certificate statistics
- Plan next month's training sessions
Quarterly Tasks (1 hour)
- Review user list (remove inactive users)
- Audit certificate data for accuracy
- Evaluate if you need to upgrade plan
- Review and update certificate templates
- Analyze verification trends
Completion Checklist
Phase 1: Account Setup
- Created account
- Took interactive tour
- Understand dashboard
Phase 2: Clean Up
- Deleted sample certificates
- Reviewed sample categories
Phase 3: Categories
- Planned category structure
- Created 3-5 categories
Phase 4: Certificates
- Created first certificate
- Tested Design Studio templates
- Practiced editing
Phase 5: Verification
- Tested public verification
- Added verification info to process
Phase 6: Bulk Operations (optional)
- Prepared CSV format
- Tested bulk import
Phase 7: Team Setup (optional)
- Invited team members
- Trained team
Phase 8: Settings
- Updated organization profile
- Set preferences
- Reviewed security settings
Phase 8: Go Live
- Announced to stakeholders
- Updated distribution process
You're fully set up when all relevant items are checked!
What to Do Next
Start Issuing Certificates
You're ready! Begin creating certificates for:
- Completed training sessions
- Course completions
- Professional certifications
- Achievement recognition
Explore Advanced Features
Once comfortable with basics, explore:
- Expiration tracking - Automated renewal reminders
- Bulk operations - Import/export hundreds of certificates
- Design Studio - Brand your certificates fully (Basic and Pro feature)
- Verification widget - Embed verification on your own website
Get Help When Needed
Resources:
- Help Center - Browse all articles (you're here!)
- Email Support - support@certlister.com
Common Questions
Q: How long does this entire setup take?
A: Most organizations complete setup in 1-2 hours. If you're working alone and only issuing a few certificates, you can be up and running in 30 minutes.
Q: Can I skip steps?
A: Yes! The checklist is comprehensive. Skip:
- Bulk operations if creating one certificate at a time
- Team setup if working alone
- Advanced settings if defaults work for you
Minimum to get started:
- Tasks 1-7 (Account + Categories)
- Task 8 (First certificate)
- Task 11 (Test verification)
That's under 30 minutes.
Q: What if I get stuck?
A: Each task links to detailed help articles. If you can't find an answer:
- Search the Help Center
- Email support@certlister.com
- Check troubleshooting articles
Q: When should I upgrade from Free to Basic or Pro?
A: Upgrade when you:
- Reach 50 certificates (Free tier limit)
- Need to invite team members (Basic includes up to 5 users)
- Want all background templates in the Design Studio
- Need bulk operations and CSV import
- Want unlimited certificates (Pro)