
Account Settings
Time to read: 8 minutes
Overview
The Settings page is your control center for everything related to your account, organization, and subscription. Open it from the sidebar or go directly to https://app.certlister.com/settings.
Settings are organized into nine tabs: Profile, Organization, Customization, Features, Email, Team, Notifications, Plan & Billing, and Danger Zone. Use the ?tab= URL parameter to deep-link to any tab directly (e.g. …/settings?tab=team).
Profile
Manage your personal account details.
- First name and Last name — Update your display name. This appears in the admin interface and in team activity logs.
- Email — Change it yourself with the Change button under the address. See Changing your login email below.
- Password — Enter your current password, then set a new one. Passwords must be at least 8 characters and include an uppercase letter, a lowercase letter, a number and a symbol. If you sign in with Google and have no password yet, use Set a password instead — we email you a link to choose one. Adding a password gives you a second way in and turns on two-factor authentication.
Changing your login email
Your login email is the address you sign in with, so changing it takes confirmation from the new address — nothing changes until you click the link we send there.
- On the Profile tab, click Change under your email address.
- Enter the new address, and confirm it's you:
- If you have a password, enter it.
- If you sign in with Google and have no password, we email a 6-digit code to your current address. Enter that.
- We send a confirmation link to the new address, and a notice to the old one so you'd know if someone else asked.
- Open the link and press Confirm this address. The link is valid for 24 hours.
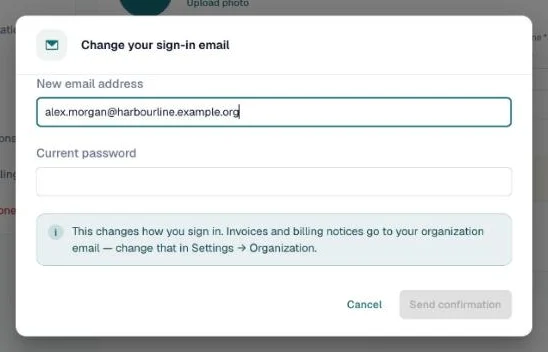
While you're waiting, Settings shows the pending address with Resend and Cancel. Cancelling clears it and the link stops working.
After you confirm
Confirming signs you out everywhere, on every device. That's deliberate — your sign-in identity changed. Sign in again with the new address.
If you sign in with Google: the new address is not a way to sign in yet. You still sign in with Google, under your original Google account. To use the new address, sign in with Google and then use Set a password on the Profile tab.
If the old address gives a different message for a few minutes
For up to five minutes after the change, signing in with the old address can show "Your account changed a moment ago. Sign in again." instead of the usual "wrong email or password" message. That's expected and it clears on its own — nothing is wrong with your account, and the old address never signs you in. Sign in with the new one.
What doesn't change
Your login email is separate from your organization email, which is where invoices and billing notices go and what recipients see on credentials. Change that under Settings → Organization.
Two-factor authentication
Two-factor authentication (2FA) is on the Profile tab, with the password and trusted devices.
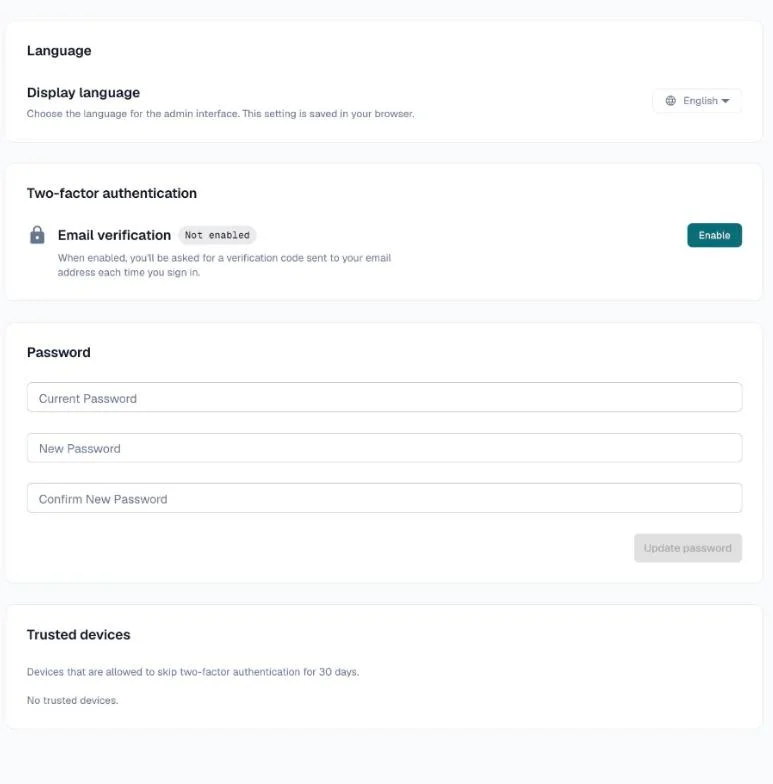
CertLister supports email-based one-time passwords (OTP). When 2FA is on:
- You enter your password as normal
- A 6-digit code is sent to your email
- Enter the code to complete sign-in. Codes expire after 10 minutes.
To turn it on:
- Go to Settings → Profile
- Next to Email verification, click Enable
- Enter the 6-digit code we email you, then click Verify
To turn it off:
- Go to Settings → Profile
- Click Disable
- Confirm with your current password
Trusted devices lists the browsers that can skip the code for 30 days.
Note: If you sign in with Google and have no CertLister password, two-factor authentication isn't available — Google handles security for those sign-ins. Set a password on the Profile tab and it becomes available.
Organization
Configure your organization's public-facing profile.
- Logo — Upload a PNG or JPG. Shown on the public verification page on every plan, and in credential emails on Basic and Pro.
- Organization Name — The name shown to credential recipients on the verify page and in emails.
- Website — Optional. Shown as a link on the verify page when the issuer info section is enabled.
- Industry — Optional. Shown in the issuer trust section on the verify page.
- Company Size — Optional. Internal use only.
Changes reach your verification pages within a few minutes.
Customization
Brand Color
Choose a primary color used on your public verification page and embeddable widget. Available on all plans. Verification Page → Appearance shows it too, with an Edit in Settings button that brings you back here.
Verify Page URL
Set a custom slug for your public verify page (e.g. certlister.com/verify/your-slug/). The slug must be unique across all organizations. Available on all plans.
Verify Page Options
These moved to Verification Page: issuer information and the "Powered by CertLister" line are on its Appearance tab, and the recipient name search and the other verify page switches are on its Options tab. The Customization tab links there. Hiding "Powered by CertLister" is on the Pro plan.
Credential Numbering
Control how new credential numbers are made. The Example number shows the format before you save.
| Setting | Description |
|---|---|
| Prefix | Text at the start of every credential number (e.g. CERT) |
| Numbering mode | Auto — the date plus a random code (e.g. CERT-20260927-A3F8B2C9); or Sequential — counts up from 1 for each prefix, and skips a number already in use, such as one typed by hand |
| Digits | Sequential mode: how many digits the number has (e.g. 0042) |
| Reset period | Sequential mode: start counting again Never, Yearly, or Monthly |
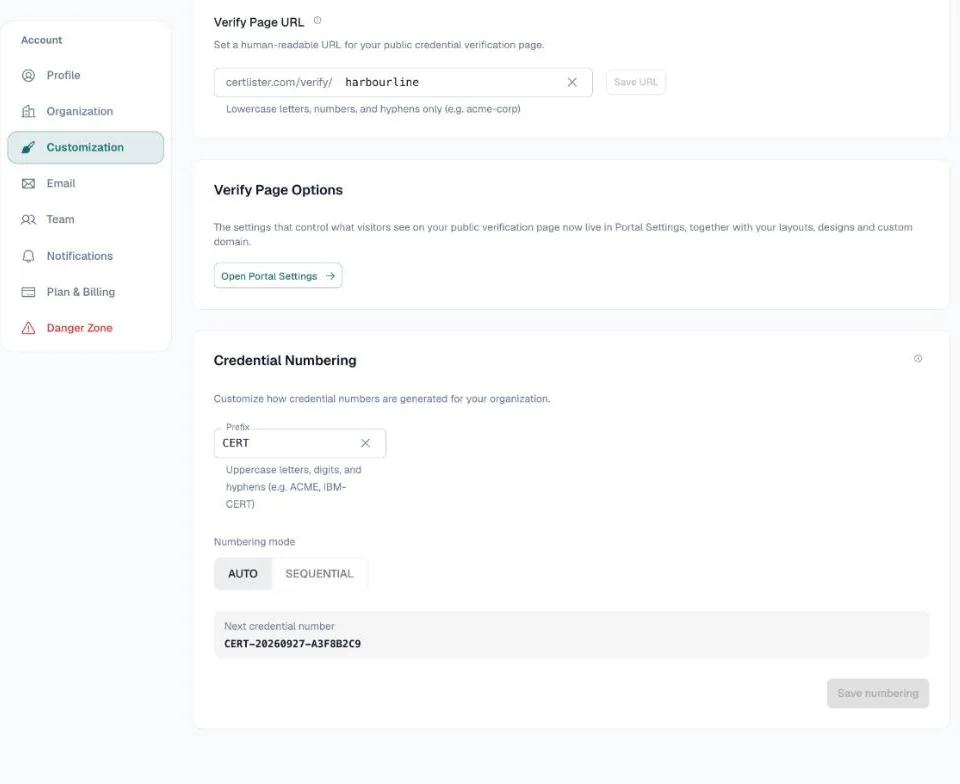
Note: Changes only affect newly issued credentials. Existing credential numbers are not updated. A category can override the prefix — see Categories.
Features
Settings → Features turns off the parts of CertLister your organization doesn't use. Only admins can change it.
- Wallet cards — the card-sized, two-sided PDF.
- Digital badges — badge images and Open Badges 3.0.
- Quick issue row — the one-line issue form at the top of Credentials.
A feature that is off disappears from the app, from emails, from the Recipient Portal and from your verification page. Categories stop making badges automatically, and automations skip badge steps. Nothing is deleted: turn the feature back on and everything returns.
If you answered What do you issue? when you set up your account, we turned off what that answer doesn't need. You can change it here at any time.
Customize the emails recipients get: reply-to address, subject, intro message, footer text, and the renewal line in expiry reminders. Reply-to, subject and intro are on the Basic and Pro plans, and the footer on Pro; the reminder text is on every plan. The email language applies to both emails on every plan.
Notifications
Choose which email notifications you receive. Each switch saves as soon as you change it.
| Notification | Description |
|---|---|
| Credential created | Email when you issue credentials. Several issued at once arrive as one email |
| Credential revoked | Email when you revoke credentials |
| Team changes | Email when someone joins or leaves the team, or their role changes |
| Expiry digest | Every Monday, the credentials that expire in the next 30 days |
| Recipient portal requests | Email when a recipient sends a request through the portal |
Below the switches, Recipient expiry reminders sets when recipients are reminded before a credential expires — up to 5 steps, each 1–365 days before. The schedule is the same for the whole organization, but a reminder goes out only when Send expiry reminder email is on for the credential's category, or was turned on for that credential when it was issued. See Credential Automation.
Plan & Billing
View your current plan, track usage, and manage your subscription.
For full details on plans, pricing, upgrading, and downgrading, see the Plans & Billing help article.
Quick links:
- Upgrade / Change Plan — Select a new plan and billing cycle
- Manage Billing — Opens the Stripe Customer Portal for payment method updates and invoice history
- Usage meters — See credentials, team members, designs, and categories used vs. your plan limits
Field Labels
Field labels moved to Verification Page → Field labels. There you can rename standard fields — for example Recipient Name → "Student Name" or Expiry Date → "Valid Until". Available on every plan.
Custom labels appear on the public verify page. The underlying data and API identifiers are unchanged.
Danger Zone
Irreversible actions that affect your account or organization.
Leave Organization
Available to members who are not Admins. Removes your access to the organization immediately.
Delete Account
Available to organization Admins only. Permanently deletes:
- Your organization and all its data (credentials, categories, designs, files)
- All team member accounts associated with the organization
- All generated PDFs and uploaded assets in storage
This action cannot be undone. You will be asked to type DELETE to confirm.
Note: Deleting your account cancels your paid subscription first. If that cancellation fails, nothing is deleted and you can try again or contact support@certlister.com.