
How to Create Your CertLister Account
Time required: Under 5 minutes
What you'll need:
- First and last name
- Email address
- Password (or use Google Sign-In)
Overview
Creating a CertLister account is a two-step process:
- Create your account — enter your name, email, and password
- Set up your workspace — name your organization and add a few details (optional, can be skipped)
After both steps you land directly on your dashboard, ready to start issuing credentials.
Method 1: Sign Up with Email and Password
Step 1: Go to the Sign-Up Page
- Visit app.certlister.com/auth/register
- Or click "Get Started" on the CertLister website
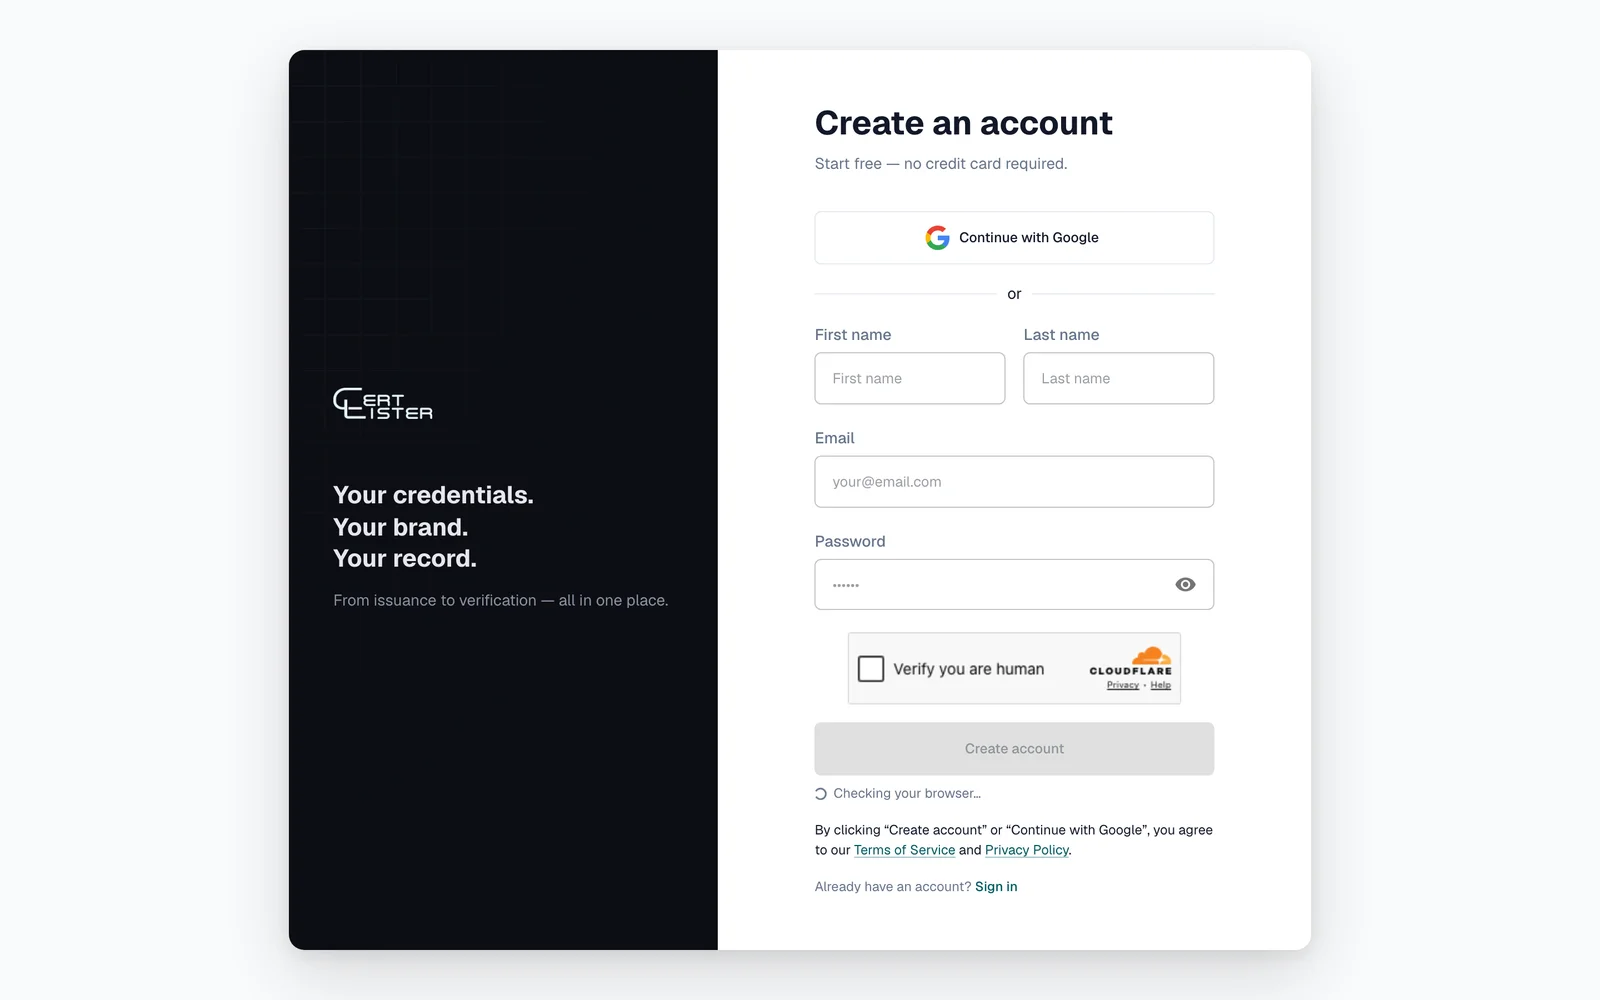
Step 2: Fill Out the Registration Form
Your Account Information:
- First Name — your first name (e.g. "Sarah")
- Last Name — your last name (e.g. "Johnson")
- Email Address — your work email, used to log in (e.g. "sarah@yourschool.edu")
- Password — must meet the following requirements:
- At least 8 characters long
- One uppercase letter (A–Z)
- One lowercase letter (a–z)
- One number (0–9)
- One special character (!@#$%^&* etc.)
Step 3: Complete CAPTCHA Verification
CertLister uses Cloudflare Turnstile to prevent spam accounts. A verification widget will appear below the form — wait for the green checkmark before continuing.
Step 4: Click "Create account"
Click "Create account" and wait a moment while your account is created. You'll be taken directly to Step 2.
Step 5: Set Up Your Workspace (Optional)
After your account is created you'll see two short setup screens. Everything here is optional — you can fill it in later from Settings → Organization at any time.
Screen 1 — What's your organization called?
Enter your company or school name. It appears on every credential you issue. Click "Continue", or "Skip setup — go straight to dashboard".
Screen 2 — A little more about you
| Field | Description |
|---|---|
| Team size | Choose from a dropdown |
| Industry | Select from suggestions or type your own |
| Website | Your organization's website |
Click "Go to Dashboard" to save and continue, or "Skip for now" to go straight to the dashboard without saving.
Method 2: Sign Up with Google
Faster if you already have a Google account.
Step 1: Click "Continue with Google"
On the sign-up page, click the "Continue with Google" button. You'll be redirected to Google's sign-in screen.
Step 2: Choose Your Google Account
- Select the Google account you want to use
- Review the permissions CertLister is requesting (basic profile: name and email)
- Click "Continue" or "Allow"
Step 3: Set Up Your Workspace
First-time Google sign-ins see the same two setup screens as email sign-ups. Fill in your organization details or click "Skip for now".
Signing In
Returning users can sign in at app.certlister.com/auth/login.
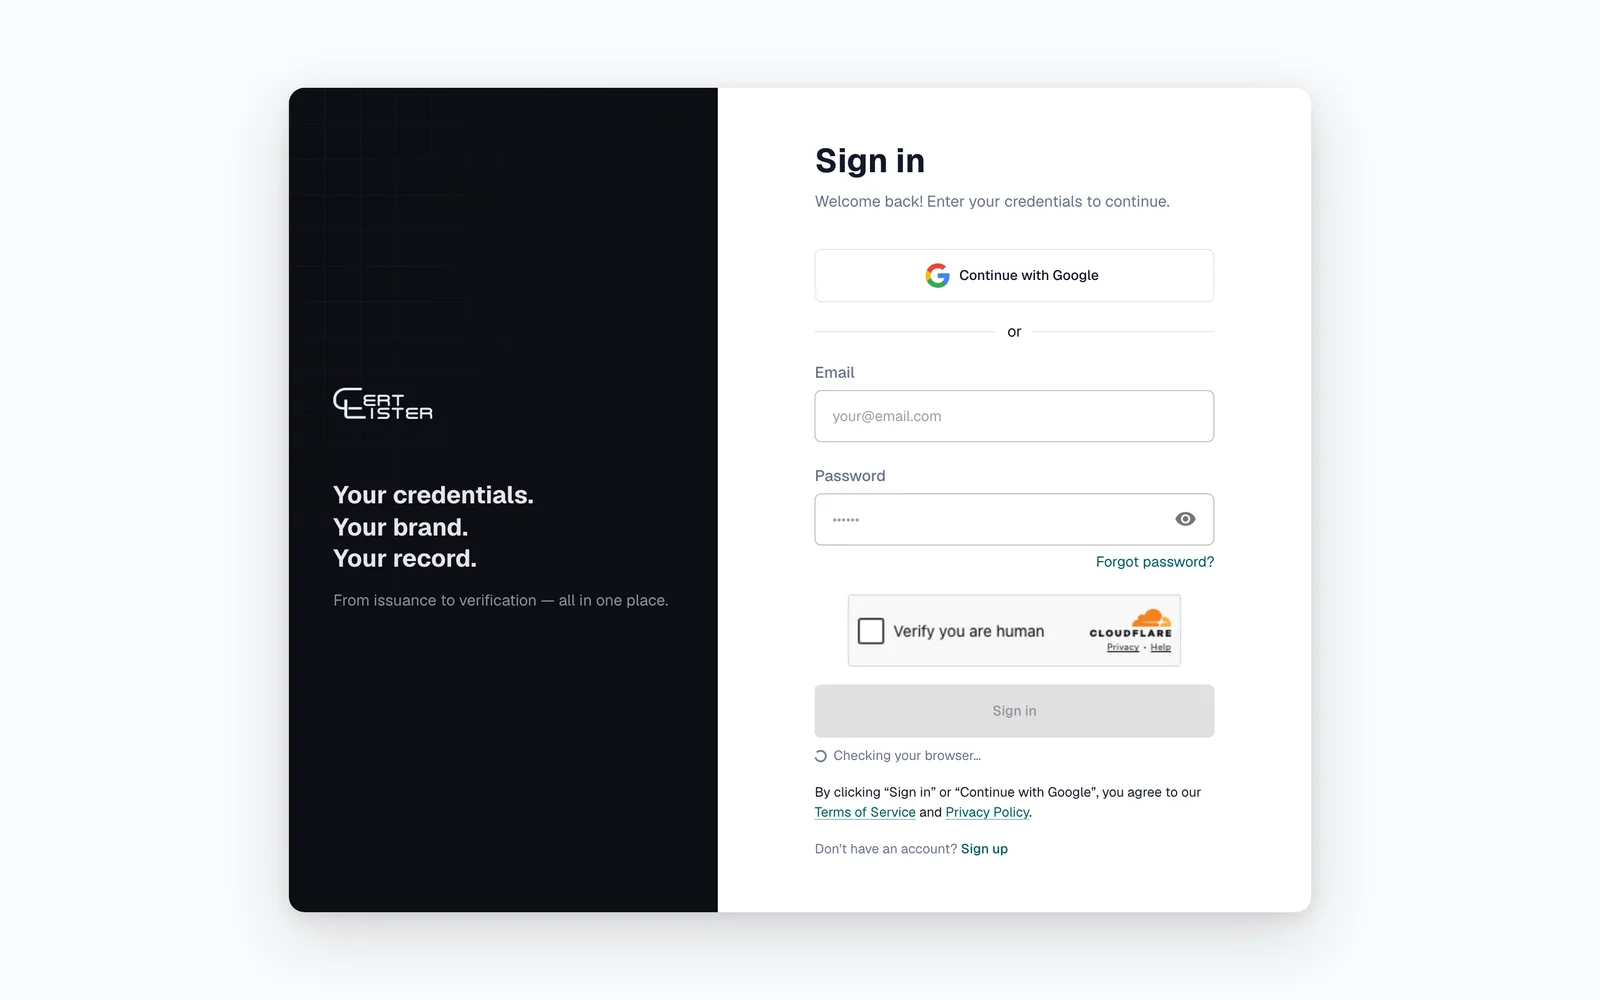
Use your email and password, or "Continue with Google" if you signed up with Google.
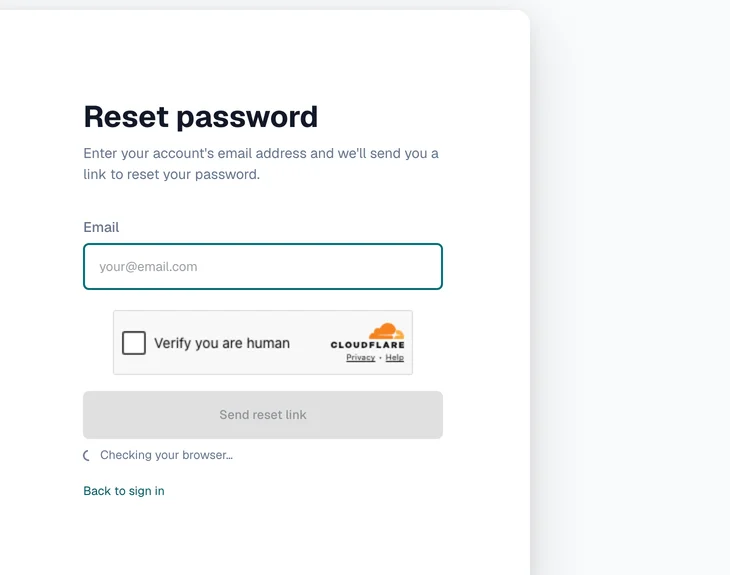
Forgot your password? Click "Forgot password?" on the sign-in page, enter your email, and CertLister sends you a link to set a new one.
What Happens When You Sign Up
When you create your account, CertLister automatically:
- Creates your organization
- Sets you as the organization Admin
- Adds two starter categories, Professional Development and Technical Training, and a default Editorial design — rename, change, or delete them
- Sets up your public verification portal
- Initializes your dashboard with statistics
This all happens in a few seconds.
Your Free Plan
When you sign up you get:
- 10 credentials every month — enough to try CertLister with real records
- 1 user seat (invite more with Basic or Pro)
- All core features — credential management, verification, expiration tracking
- Public verification portal — let employers verify credentials instantly
- Design Studio — every template included
- No credit card required — free forever, no trial expiry
Next Steps
1. Create Your First Category
Credentials are organized by category (e.g. "CPR Certification", "Safety Training"). Create at least one before issuing credentials. See Categories for details.
2. Issue Your First Credential
Once you have a category, you're ready to create credentials. See our step-by-step credential guide.
Account Security: Two-Factor Authentication (2FA)
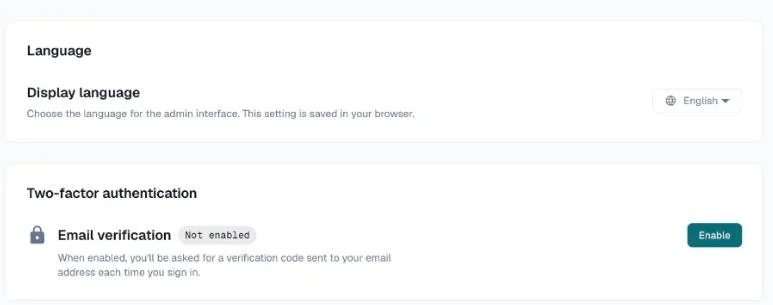
CertLister supports two-factor authentication (2FA) using email one-time passwords (OTP). Enabling 2FA adds an extra layer of protection — after signing in with your password, you'll be prompted for a 6-digit code sent to your email.
2FA is available on all plans and is optional per user.
How to enable 2FA
- Go to Settings → Profile
- Find the Two-factor authentication section
- Next to Email verification, click Enable
- CertLister sends a 6-digit code to your email address
- Enter the code in the Confirm your email dialog (valid for 10 minutes) and click Verify
- 2FA is now active on your account
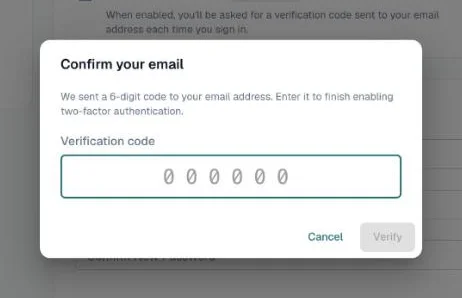
Signing in with 2FA enabled
After entering your email and password, you'll see a prompt to enter your authentication code. Check your email for a 6-digit code and enter it within 10 minutes. If you don't receive it, check your spam folder or click Resend code.
How to disable 2FA
- Go to Settings → Profile
- Find the Two-factor authentication section
- Click Disable
- Enter your current password to confirm
Note: Google Sign-In accounts that have never set a CertLister password cannot enable MFA — Google's own authentication is used instead. If you signed up with Google and also set a CertLister password, MFA is available.
Troubleshooting
"Email already exists"
You already have an account with that email.
- Try signing in instead: app.certlister.com/auth/login
- Use the "Forgot password?" link if you don't remember your password
- On the sign-up page, if an existing email is detected you'll see options to Reset Password or Sign In directly
"Password too weak"
Your password doesn't meet the requirements. Use a mix of uppercase, lowercase, numbers, and special characters — for example MySchool2026!.
CAPTCHA not working
- Refresh the page and try again
- Temporarily disable browser extensions (especially ad blockers)
- Try a different browser (Chrome, Firefox, Safari, and Edge all work)
Google Sign-In not working
- Popup blocked — allow popups for certlister.com in your browser settings
- Third-party cookies — make sure cookies aren't blocked for certlister.com
- Try signing out of Google and back in, then try again
- Fall back to email/password sign-up if the issue persists
Account locked after failed sign-in attempts
After 5 failed login attempts, your account is locked for 15 minutes. Wait and try again, or use "Forgot password?" to reset.
Frequently Asked Questions
Q: Is the Free plan really free forever?
A: Yes. No time limit, no credit card required, no surprise charges. The Free plan (10 credentials a month, 1 user) is available indefinitely.
Q: Can I update my organization details later?
A: Yes. Go to Settings → Organization at any time to update your organization name, industry, website, logo, and more.
Q: Can I change my email address?
A: Yes. Go to Settings → Profile and click Change next to your email. Enter the new address and confirm with your current password (accounts without a password get a 6-digit code at the current address instead). CertLister emails a link to the new address; the change takes effect when you open it and confirm, and you're then signed out everywhere.
Q: What if I need help?
A: Browse the Help Center or email support@certlister.com — we typically respond within 24 hours on business days.